
No products in the cart.
Uncategorized
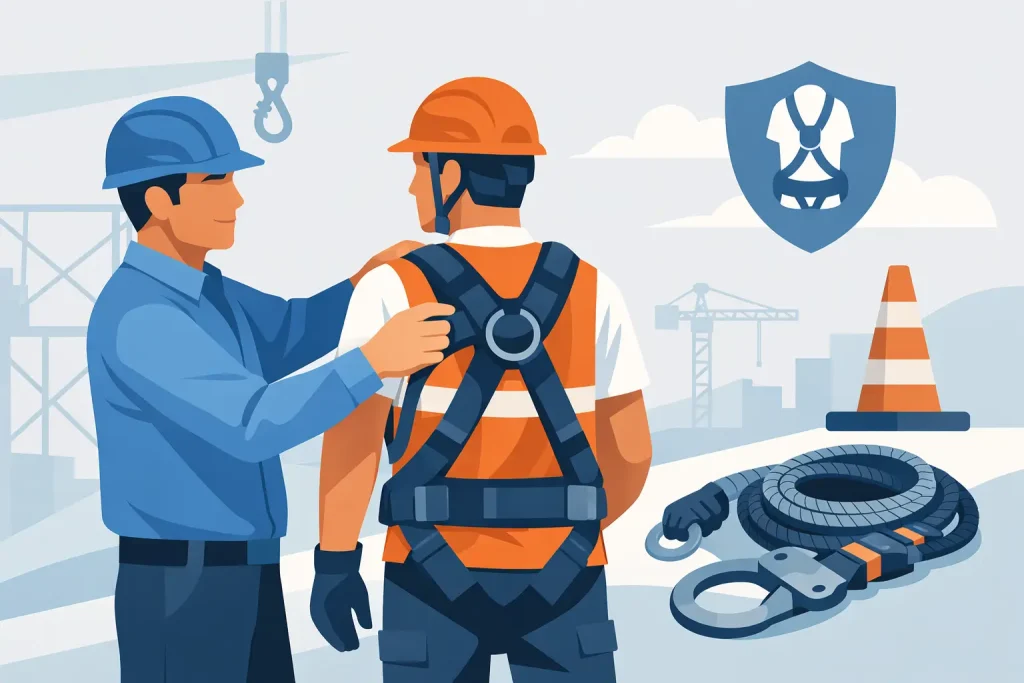
How to Fit a Safety Harness Safely at Work
28
Jul
Jul
A harness that is loose, twisted, or adjusted for the wrong connection point can turn a fall arrest system into another source of injury. Knowing how to fit a safety harness correctly is a basic requirement before a worker climbs, enters an elevated work area, or connects to an approved fall protection anchor.
A full-body harness is only one part of a complete fall protection system. The work method, approved anchor point, connecting device, clearance below the worker, and rescue plan all matter. The harness must also be appropriate for the task, whether the worker needs fall arrest, positioning, restraint, suspension, or ladder climbing support.
Start With the Right Harness and Size
Select a full-body harness designed for the intended application. A standard dorsal D-ring harness is commonly used for personal fall arrest. Harnesses with side D-rings may be used for work positioning, while front D-rings can be specified for ladder climbing, restraint, or certain rescue applications. Do not connect to a D-ring unless the harness labeling and the fall protection plan approve that use.
Sizing is not a minor comfort issue. A harness that is too large can shift during a fall and create excessive force at the legs, shoulders, or chest. One that is too small may restrict movement, prevent proper adjustment, or encourage workers to loosen straps. Check the manufacturer’s sizing chart and account for the clothing worn underneath, including rain gear, high-visibility outerwear, or cold-weather layers.
For work involving electrical arc flash or flash fire hazards, the harness and all connected equipment must be reviewed as part of the hazard assessment. A fall protection harness does not replace flame-resistant clothing, arc-rated PPE, or equipment selected under NFPA 70E, NFPA 2112, CSA Z462, or CAN/CGSB 155.20. These standards address different hazards and must not be treated as interchangeable.
How to Fit a Safety Harness Step by Step
Fit the harness on level ground before approaching an edge or climbing structure. If the harness has been stored in a bag or truck box, lay it out first. This makes twists, crossed straps, and damaged webbing easier to spot.
1. Hold the dorsal D-ring and shake out the straps
Pick up the harness by the dorsal D-ring, located on the back between the shoulder blades. Let the leg straps, chest strap, and shoulder webbing hang freely. Check that all buckles and straps are untangled.
The harness should resemble a vest when lifted by the dorsal D-ring. If the straps are crossed or the leg straps are routed through the shoulder webbing, stop and straighten it before putting it on.
2. Put on the shoulder straps
Slip one arm through each shoulder strap as you would put on a vest. The dorsal D-ring should sit in the center of the upper back, between the shoulder blades. It should not hang low across the middle of the back or ride up against the neck.
A helper can confirm D-ring placement, especially when workers wear bulky outer layers. On a properly fitted harness, the D-ring stays centered as the worker bends, reaches, and turns.
3. Connect and adjust the leg straps
Bring each leg strap between the legs and connect it to the buckle on the same side. Never cross the straps. Tighten each leg strap until it is snug but does not restrict circulation or movement.
Use the flat-hand check: a flat hand should fit between the strap and the leg, but a clenched fist should not. This is a practical check, not a substitute for the manufacturer’s instructions. Harness designs and buckle systems vary, so follow the adjustment method shown on the harness label.
Leg straps that are too loose are one of the most common fitting errors. In a fall, loose straps can allow the body to move too far before the harness takes load. Straps that are overtightened can make climbing, kneeling, and long work periods difficult, which often leads workers to alter the fit later.
4. Fasten the chest strap
Connect the chest strap across the middle of the chest. Position it in the mid-chest area, generally about 6 to 8 inches below the collarbone. It should not sit at the throat and should not be dropped toward the abdomen.
Tighten the chest strap enough to keep the shoulder straps correctly positioned. It is not intended to carry fall arrest forces. Its job is to keep the shoulder webbing in place and reduce the risk of a worker slipping out of the harness during a fall.
5. Adjust the torso straps and keepers
Adjust the torso webbing so the harness fits close to the body without binding. The shoulder straps should sit evenly and the sub-pelvic strap should support the body below the buttocks. The webbing should remain flat against the body, with no twists.
Secure excess strap length in the provided web keepers. Loose strap ends can catch on equipment, snag on steel, or interfere with the connection point. Do not tie excess webbing in knots or modify the harness to make it fit.
Check Fit Before Connecting
Before connecting the lanyard, self-retracting lifeline, or other connector, perform a movement check. Squat, reach overhead, bend at the waist, and take several normal steps. The harness should stay centered without the chest strap moving up, leg straps loosening, or the D-ring shifting off the upper back.
Have a competent person or trained coworker verify the fit when site procedures require it. This is particularly useful for new workers, workers changing from summer to winter PPE, and crews using unfamiliar harness models.
The connection itself must be compatible with the system. Use approved connectors and connection points. Do not clip a lanyard to a side D-ring for fall arrest unless the harness instructions specifically allow it. Do not connect incompatible hooks, carabiners, or snap hooks in ways that can cause rollout or gate loading.
Inspect the Harness Before Every Use
A good fit does not make damaged equipment safe. Inspect the harness before each use and remove it from service if it fails inspection. Follow the manufacturer’s formal inspection schedule in addition to daily pre-use checks.
Look over the full length of the webbing for cuts, fraying, broken fibers, burns, chemical damage, paint buildup, stiffness, or heavy abrasion. Check stitching for loose, broken, or pulled threads. Examine D-rings, buckles, grommets, and adjusters for cracks, distortion, sharp edges, corrosion, or missing parts.
Check the labels too. If the product label is missing or unreadable, the harness may no longer be identifiable by model, capacity, manufacture date, or applicable standard. That can make it impossible to confirm whether it is suitable for the job.
A harness involved in a fall arrest event must be removed from service immediately, even if visible damage is not obvious. It should only return to use if the manufacturer’s authorized process permits evaluation and recertification. Do not make field repairs with tape, rivets, stitching, or replacement parts that are not approved for that model.
Avoid These Common Fit Errors
The most frequent errors are simple: shoulder straps worn twisted, leg straps left loose, chest straps positioned too high or too low, and dorsal D-rings sitting below the shoulder blades. Another problem is fitting the harness over clothing that will not be worn during the job. A harness adjusted over a T-shirt may need readjustment when an insulated jacket or FR outer layer is added.
Workers should also avoid sharing a harness without checking the fit from the beginning. Adjustment settings that work for one person are not automatically safe for another. For purchasing teams, standardizing on a few approved harness models can simplify training, spare equipment, inspections, and replacement planning.
Fit Is Only One Part of Fall Protection
A correctly fitted harness cannot compensate for an unsuitable anchor, excessive free-fall distance, swing-fall exposure, or inadequate clearance. Review the job before work starts. The fall protection plan should identify the anchorage, connection method, equipment compatibility, rescue procedure, and any hazards created by sharp edges, heat, chemicals, electrical exposure, or moving equipment.
For crews that work at height regularly, a consistent harness fitting routine saves time without cutting corners: inspect it, put it on by the dorsal D-ring, tighten leg straps, position the chest strap, secure loose ends, and complete a movement check. The final fit should feel secure enough to protect the worker, while still allowing the job to be performed properly.
Common Questions
How tight should safety harness leg straps be?
They should be snug enough that a flat hand fits between the strap and the leg, but not loose enough for a fist to pass through. The worker must still be able to walk, climb, squat, and move normally. Always follow the harness manufacturer’s fitting instructions if they differ.
Where should the back D-ring sit on a safety harness?
The dorsal D-ring should sit centered between the shoulder blades on the upper back. If it hangs below the shoulder blades, the shoulder straps or torso adjustment may be too loose.
Can a safety harness be worn over a winter jacket?
Yes, if the harness still fits correctly over the outer layer and the manufacturer permits that use. The harness must be readjusted after heavy clothing, rain gear, or FR outerwear is added. Do not assume a warm-weather adjustment remains correct in winter.
Can I use side D-rings for fall arrest?
Usually, no. Side D-rings are generally intended for work positioning, not personal fall arrest. Use only the connection point identified by the harness manufacturer and the site fall protection plan for the intended application.
What should I do if a harness has stopped a fall?
Remove it from service immediately. Tag it so it cannot be reused and follow your employer’s inspection and replacement procedure. A harness that has arrested a fall may have hidden damage even when the webbing and hardware appear normal.
